
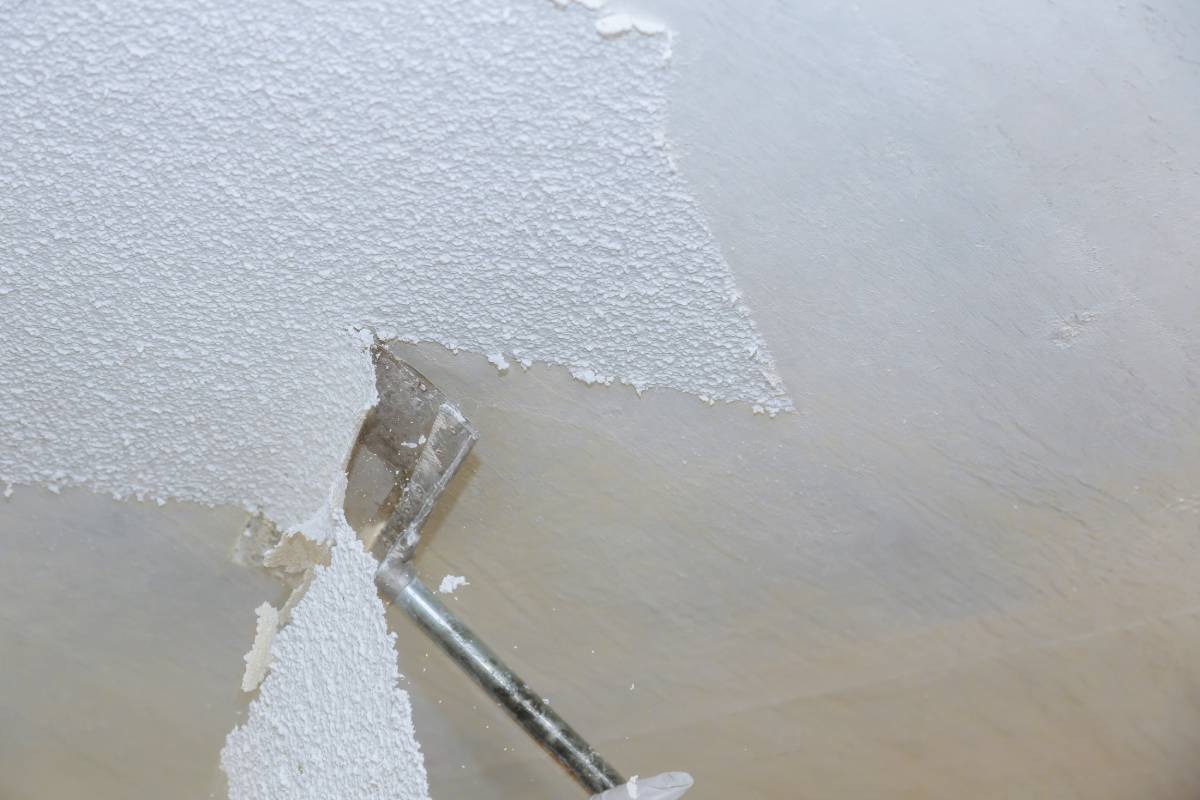

Popcorn ceilings, once a popular choice for their ability to hide imperfections and reduce noise, have fallen out of favour in recent years due to their dated appearance and potential health risks, particularly if they contain asbestos.
Many homeowners in Australia are faced with the decision of whether to remove their popcorn ceilings and, if so, how to go about it. In this article, we will explore the considerations involved in removing popcorn ceilings, including costs, DIY methods, and professional services, to help you make an informed decision for your home.
Should I remove my popcorn ceiling?
Popcorn ceilings, also known as textured or acoustic ceilings, were once popular for their ability to hide imperfections and dampen sound. However, many homeowners today find them outdated and unsightly. If you’re contemplating whether to remove your popcorn ceiling, there are several factors to consider.
1. Age and Condition
- Age: Popcorn ceilings were commonly installed in homes built before the 1980s. If your home falls into this category, it’s likely that your popcorn ceiling contains asbestos, a hazardous material. Asbestos was commonly used in construction materials until its ban due to health concerns. If your ceiling contains asbestos, removal should be handled by professionals.
- Condition: Even if your ceiling doesn’t contain asbestos, the texture may deteriorate over time, becoming stained or damaged. In such cases, removal might be necessary for aesthetic reasons or to prepare for painting or renovation.
2. Aesthetic Preferences
- Modern Look: Many homeowners prefer smooth, flat ceilings for a modern and streamlined appearance. Removing the popcorn texture can update the look of your home and increase its resale value.
- Personal Taste: If you find the texture unappealing or difficult to clean, removing it allows you to customize your ceiling to your liking. You can choose a new texture or opt for a smooth finish.

3. Maintenance and Cleaning
- Dust and Allergens: Popcorn ceilings have a rough texture that tends to trap dust and allergens, making them challenging to clean. Removing the texture can improve indoor air quality and make maintenance easier.
- Water Damage: Popcorn ceilings are prone to water stains and damage, especially in areas like bathrooms or kitchens where moisture levels are high. Removing the texture can help prevent future water-related issues.
4. DIY vs. Professional Removal
- DIY: While it’s possible to remove popcorn ceiling texture yourself, it can be a messy and time-consuming process. DIY removal involves wetting the texture, scraping it off, and then refinishing the ceiling. It’s essential to take safety precautions, including wearing protective gear and testing for asbestos if necessary.
- Professional: Hiring professionals for popcorn ceiling removal ensures a faster, cleaner, and safer process, especially if your ceiling contains asbestos. Professionals have the expertise and equipment to handle the job efficiently.
5. Cost Considerations
- DIY: DIY removal is cheaper upfront but requires your time and effort. Costs include tools, materials, and potential repairs or refinishing.
- Professional: Hiring professionals can be more expensive but saves you time and ensures quality results. Costs vary depending on the size of the area, the condition of the ceiling, and any additional services required.
Removing a popcorn ceiling yourself is certainly feasible, but it requires careful planning, preparation, and safety precautions. Here’s a simplified guide to help you tackle the task:
1. Preparation
- Safety First: Wear protective clothing, safety goggles, a dust mask, and gloves to protect yourself from dust, debris, and potential allergens.
- Ventilation: Open windows and use fans to ensure adequate ventilation in the room.
- Cover Floors and Furniture: Use plastic sheeting or drop cloths to cover the floors and furniture to protect them from debris and moisture.
2. Test for Asbestos
- If your home was built before the 1980s, it’s crucial to test for asbestos before starting. You can purchase a DIY asbestos testing kit or hire a professional to do the testing for you. If asbestos is present, do not proceed with DIY removal; instead, hire professionals.
3. Wet the Ceiling
- Use a garden sprayer or a pump sprayer to saturate a small section of the ceiling with water. Let it soak for a few minutes to loosen the texture.

4. Scrape the Texture
- Using a wide putty knife or a ceiling texture scraper, gently scrape away the wet popcorn texture. Work in small sections to prevent damaging the ceiling underneath.
- Be careful not to press too hard or gouge the ceiling surface.
5. Repair Any Damage
- After removing the texture, inspect the ceiling for any damage, such as cracks or holes. Repair these areas with joint compound or spackling paste. Allow it to dry completely.
6. Sanding and Smoothing
- Once the repairs are dry, lightly sand the ceiling to smooth out any rough patches or uneven areas. Use a fine-grit sandpaper or sanding block.
7. Prime and Paint
- Apply a coat of primer to the entire ceiling to ensure adhesion and uniformity of the paint. Let the primer dry according to the manufacturer’s instructions.
- Finally, paint the ceiling with your chosen colour using a roller or paint sprayer. Allow the paint to dry completely between coats.
8. Clean Up
- Remove the plastic sheeting and clean up any debris from the floors and furniture.
- Dispose of the popcorn texture and debris properly according to local regulations.
Tips
- Work systematically, focusing on one section at a time to maintain control over the process.
- Take breaks as needed, especially if you’re working on a large ceiling area.
- Keep the room well-ventilated to minimize exposure to dust and fumes.
- Consider using a ceiling texture scraper with a bag attachment to collect the scraped texture directly, reducing cleanup time.
Important Note
- If at any point you encounter asbestos or feel uncomfortable with the process, stop and seek professional assistance. Asbestos removal requires specialized equipment and training to ensure safety.
The cost of removing a popcorn ceiling in Australia can vary depending on various factors such as the size of the area, the condition of the ceiling, and whether asbestos is present. Here’s a breakdown of the potential costs involved:
1. Professional Removal
- Asbestos Testing: If your home was built before the 1980s, asbestos testing may be necessary before any removal work begins. DIY asbestos testing kits can cost around $50 to $100, while professional testing services can range from $200 to $500.
- Removal Labor: Professional removal services typically charge per square meter. On average, the cost can range from $30 to $50 per square meter. For example, for a 50 square meter room, the removal cost could be between $1,500 and $2,500.
- Disposal: Disposing of asbestos-containing materials requires proper handling and disposal, which may incur additional fees. This can range from $20 to $50 per square meter, depending on the disposal method and location.
- Repairs and Refinishing: After removal, you may need to repair any damage to the ceiling and refinish it with a new texture or paint. The cost of repairs and refinishing can vary based on the extent of the damage and your chosen finish. This could add several hundred to a couple of thousand dollars to the total cost.
2. DIY Removal
- Materials: If you choose to remove the popcorn ceiling yourself, you’ll need to purchase materials such as plastic sheeting, spray bottles, putty knives, joint compound, sandpaper, primer, and paint. The cost of these materials can range from $100 to $300, depending on the size of the area and the quality of the products.
- Equipment Rental: You may also need to rent equipment such as scaffolding or ladders, as well as a texture scraper or sprayer. Equipment rental costs can vary but typically range from $50 to $200 per day.
- Personal Protective Equipment (PPE): Don’t forget to factor in the cost of safety gear such as masks, goggles, and gloves, which can range from $20 to $100.
Overall, the total cost of removing a popcorn ceiling in Australia can range from a few hundred dollars for a DIY project to several thousand dollars for professional removal, especially if asbestos is present. It’s essential to consider both the financial investment and the safety implications when deciding on the best approach for your home.
Conclusion
So, if you’re thinking about getting rid of your popcorn ceiling in Australia, there are a few things you should think about first. You want to make sure you’ve got enough money to cover the costs, that you’re taking the right safety precautions, and that you’re doing what you really want. You could do it yourself and save some cash, but it’ll take a lot of time and effort. Plus, you need to be super careful if it contains asbestos. If you hire someone to do it for you, it’s more convenient and they know what they’re doing, especially when it comes to asbestos.
Either way, updating your ceiling can make your home look better and be worth more, and you’ll have a safer and more modern space to live in. Just remember to stay safe and dispose of everything properly.


